Going Big: How to Transfer Lettering to a Wall
Over the past few weeks, I explained how I make my lettering through sketching and refining on paper. But what about turning a design into a mural?
Going bigger than you've gone before is incredibly challenging, but so satisfying when you're done.
Creating on large walls versus a small sheet of paper is a whole other ball game with a different set of challenges. I'm going to break down a few techniques, but first here's a quick story.

In my early days of hand lettering, I had the opportunity to assist a sign painter duo by the name of Caesar and Tom. I worked with them on a number of jobs, but there was one in particular that inspired me to push my limits and go big.
For 5 straight days they worked out in the freezing cold, suspended high in the air on a cherry picker, with all of their paints and brushes and ready to go.
It was the middle of winter, and the assignment was to paint an advertisement for a Polish beer company on the side of a building in Queens, NY. The ad was massive! Four floors high with some incredibly detailed parts.
There was one day where the snow came down so hard that we had to stop early because the paint was getting diluted.

Little by little, they hacked away at the enormous bottle, and I tried to soak up as much information about their process as I could. My main job was to help from the ground and make sure the site was safe for pedestrians. However, when they let me go up in the cherry picker, I couldn't believe what I saw.
Well, actually, I could barely see much of anything from up there.
Up close, the design was so abstract.
I had been looking at it from the ground for so long, that I didn't think about what they were seeing from their angle.
It was hard to comprehend how they were able to make such an accurate replica of the bottle. How did they match the design so perfectly at such a large scale? Well, it's not rocket science. It just requires a lot of patience. More on their technique later.
At the end of the project, I decided to try my hand at making large scale lettering. Not exactly billboard size, (and not out in the cold), but definitely larger than I had gone before. Looking back, I've made quite a few large pieces over the last couple years (mostly in chalk, but also a few in paint), and I want to share what I've learned.
"How do you get it to match the design so closely?"
I often get asked this question about the larger pieces that I've done, so I'm devoting this entire article to answering it (saving the rest of the process for a future blog post). I'm going to break down a few methods for taking lettering to a wall while staying true to the original design. And for the record, these techniques can work for any type of mural or sign (paint, chalk or any other medium). Of course, chalk is more forgiving, but they still have the same principles. Let's dive into the process.
Before we get into the sign painting techniques, first measure!
Before you decide which transfer technique to use, it helps to scope out and measure the space. You need to get a clear idea of how large your design will be, and where it will sit on the surface. It helps to make little markings in the corners, as well as a center line, so you can stand back and make sure it is in the right spot.
Also make sure to measure how much space you have away from the wall. If you are working in a narrow hallway, it is nearly impossible to get enough clearance to use a projector.
Assuming you have already refined your design, now you are ready to transfer the design to the wall. There are a few different methods for doing this, so hopefully this list will help you figure out which one is right for your project.
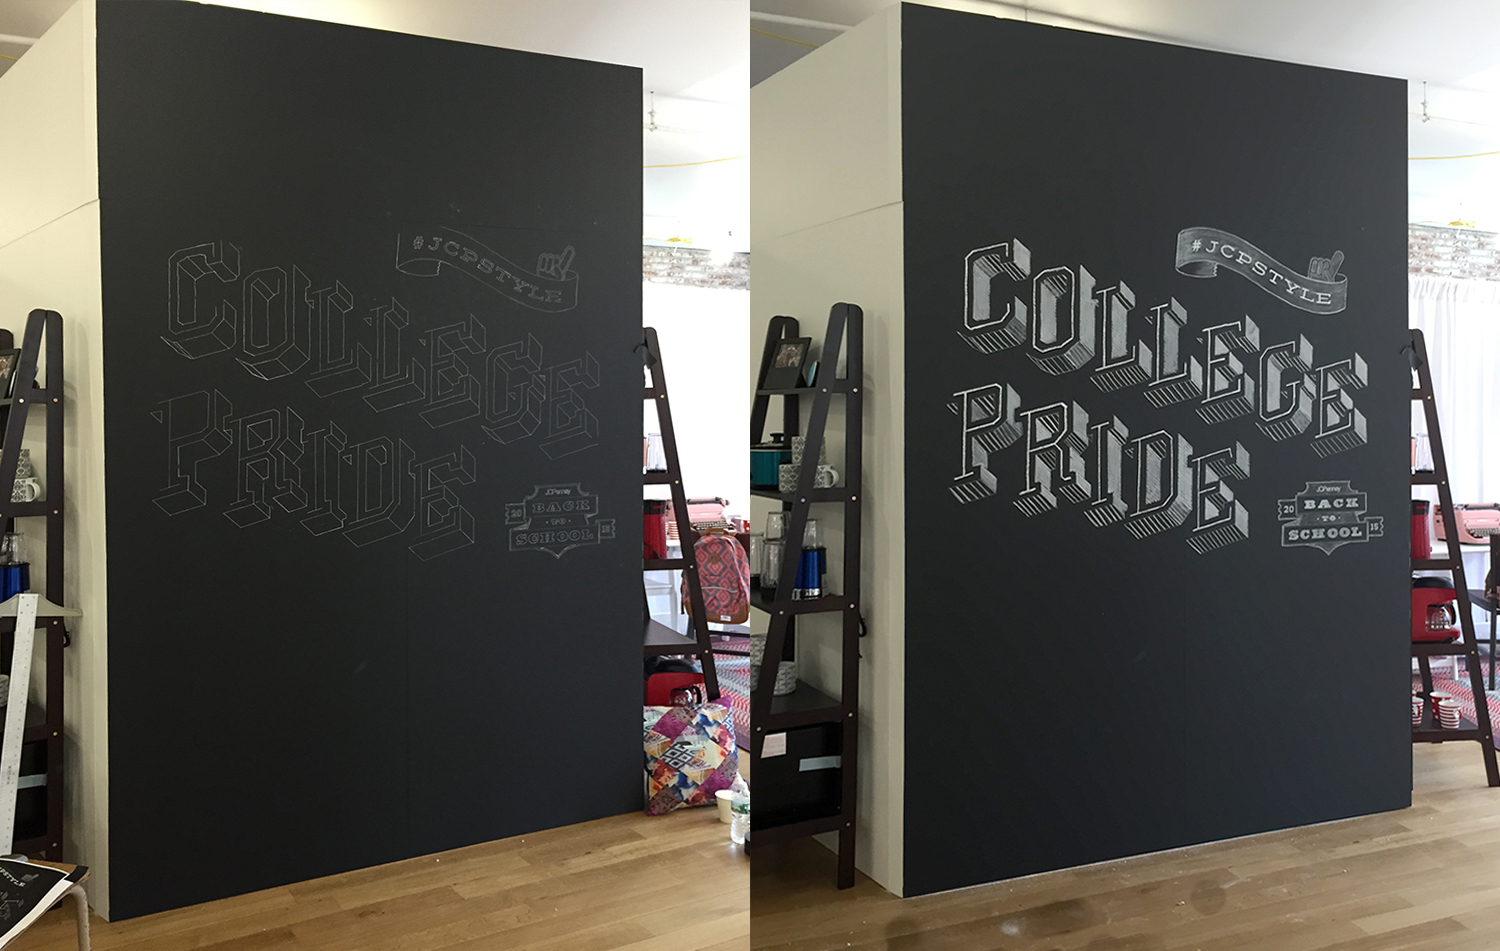
Chalk Mural I created for a JCPenney Pop Up event
Technique #1: Carbon Transfer (good for beginners)
This is my favorite technique, and the one I use most often when I am working on my murals. It's also the method I would recommend to any newbies just starting out with larger scale pieces.
This method relies heavily on the magic of transfer paper — a powder coated material that rubs off when pressure is applied. The paper is sold in various colors, so when choosing the color, try to find one that will contrast the background of the wall.
- First, if your design is not on the computer already, you need to scan the drawing in and size it to the appropriate dimensions (I use Adobe Illustrator for this). If you don't have access to a large format printer, or want to save some money, you can print it tiled on multiple sheets of printer paper and just tape them together.
- Using masking tape, hang up the print up on the wall and position it exactly where you want. You want to make sure the top edge is taped securely. The bottom is not as important.
- Lift up the bottom of the print to get underneath, and place a sheet of transfer paper between the print and the wall with the powdery side facing the wall. It can be a relatively small sheet (no more than an arms length).
- Holding the paper in place, trace over the outlines of the lettering with a ballpoint pen, moving the sheet of carbon paper underneath as you go to make sure the design is being transferred. You can lift up the bottom of the print to see if it has been transferring.
- Keep tracing and moving the paper until you have covered the whole piece. Voila! Your design is on the wall.
Pros: Very Precise, not messy
Cons: Not good for rough surfaces
Good for: Transferring designs of any size, without a lot of small details

Sign Painter Jon Bocksel painting a large wall sign after transferring his design to the wall with a pounce pattern.

My teammates Brendan Prince and Paulina Ho painting a mural after applying with a GIANT pounce pattern
Technique #2: Pounce Pattern
You may be thinking, "What the hell is a pounce pattern?". Yeah, I had never heard of it either until I worked with those sign painters. In fact, this is the technique they used for that giant beer bottle above. This technique works like a charm, no matter how big you go.
This also requires a full scale black and white print-out of the design, as well as a pounce wheel. It's basically an X-acto knife but with a pin wheel at the end of it. You will also need a pounce pad, but you can also make one at home using a sock and some chalk dust.
- Lay the print on a flat surface with a cutting mat underneath. Trace over the outlines of the design using the pounce wheel, applying pressure. This will make tiny perforated holes in the paper.
- Tape up the perforated print (AKA the pounce pattern) on to the wall or surface in the correct position. Using your pounce pad (or sock) filled with colored dust, rub over the outlines of the design.
- The dust will go through the holes, creating a colored dotted line on the surface around the whole design. Magic.
Pros: Precise, reusable once the pounce pattern is made.
Cons: Steeper learning curve, requires a few tools available online.
Good for: Sign painting, large murals, multiple identical signs, rough surfaces like brick or stucco.

Technique #3: Projection
If you have access to a projector, this is a super fast way to get your design onto a wall very quickly. Although the technique is very straightforward, there are quite a few drawbacks of this method, which is why I don't usually use it.
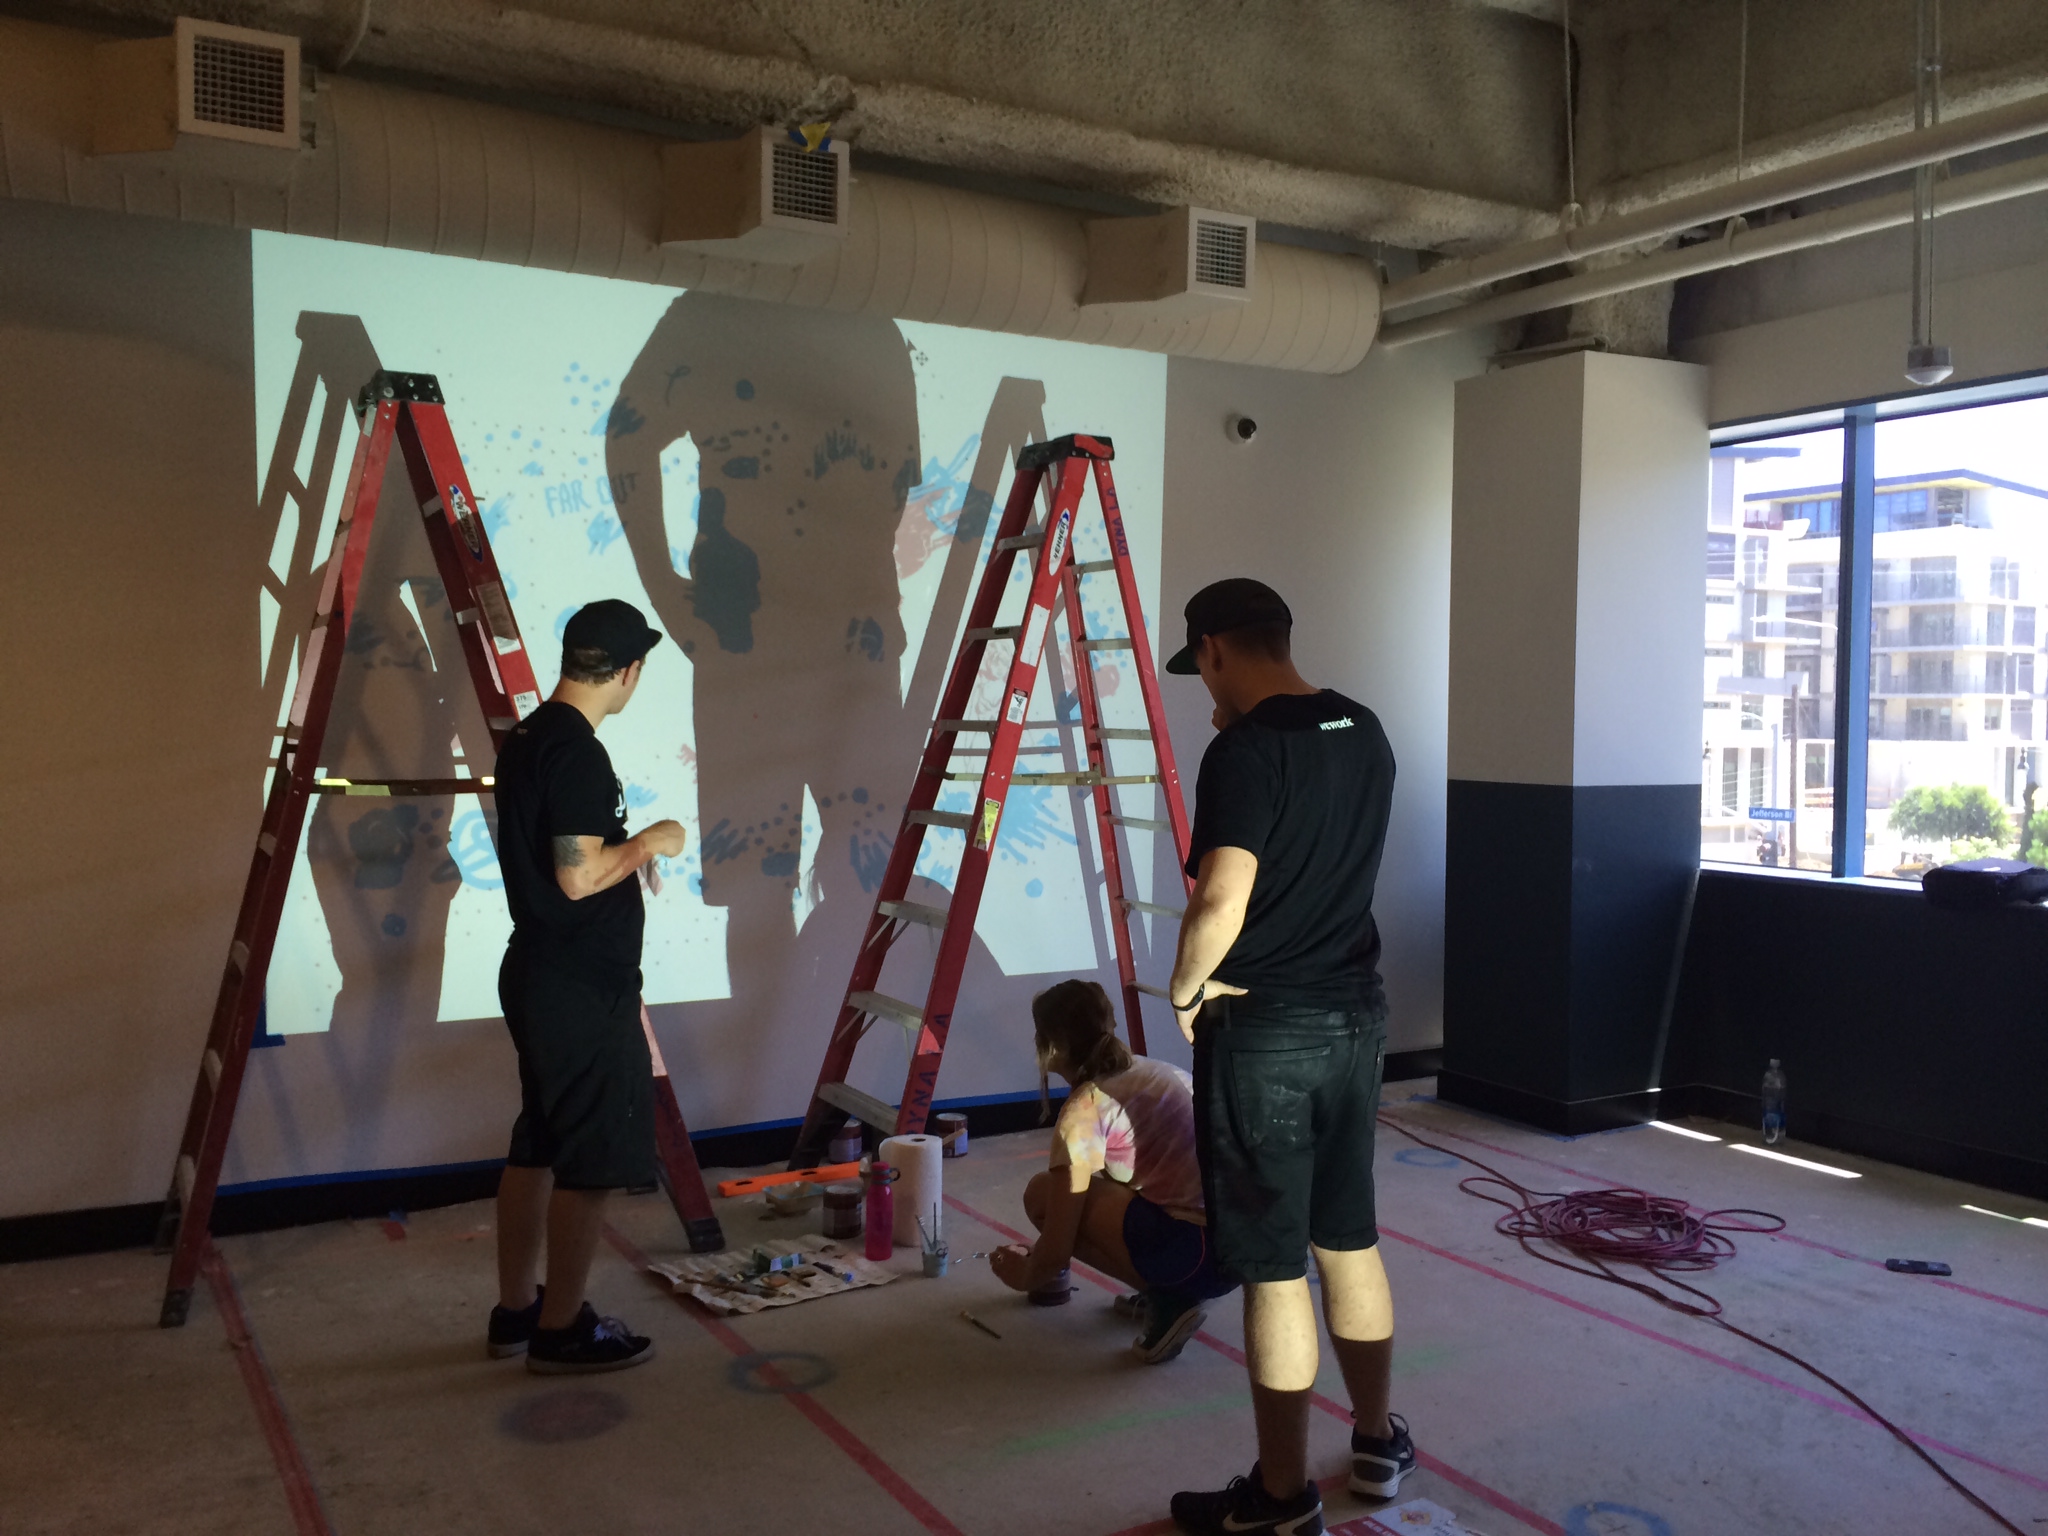
- Open the design on the computer and project it onto the wall. Position and focus the projector until the design is in the right spot.
- Then trace over the outlines using a graphite or chalk pencil (depending on surface color).
Pros: Minimal effort, precise.
Cons: Not any projector will do. It needs to be a high intensity light (I recommend the Artograph Tracer), otherwise you won't be able to see anything. Must have clearance for the projector to sit far enough away from the wall. Shadow gets in the way. Not good for outdoor murals (requires a power outlet or generator).
Good for: Smaller walls, smooth or uneven surfaces.

Collaboration with Anant Ahuja in New Delhi, India

Technique #4: Wing it!
A lot of street artists would say that the above techniques are cheating. I disagree with this because my lettering is the result of a several stages — not really a "one and done" approach. I won't deny it though. There's something really liberating about drawing or painting on a wall completely freestyle. Here's how I do it for chalk murals:
- Tape your sketch up on the wall for reference.
- Using pencil or chalk, lightly draw the outlines and containers for the lettering.
- Step back and view from afar. Adjust and refine as necessary until the design is complete.
Of course, this requires a lot more skill to do well. I mentioned in a previous article that it's best to do as little thinking as possible in each stage. Going straight to the wall goes against this idea, but can yield some interesting results.
The problem with this method is that you constantly have to step back to make sure everything is balanced. It's so difficult to design at a large size, and you can end up spending a lot of time erasing and redrawing parts. If you are looking for a clean, structured finish, this is probably not the way to go.
Pros: Fun to do, more happy accidents that can enhance the piece.
Cons: Lots of room for error, requires revisions at a large scale, not good for client work.
Good for: Improvised chalk murals, smaller murals or signs, personal projects.
It takes a lot of patience to make a large piece, regardless of the method you use. But truly, the hardest part is getting started. I hope this post inspires you to try one of these methods out. If you have questions about any of these techniques, feel free to subscribe to my newsletter below or reach out – I'm happy to help!

Chalk Mural Collaboration with Olga Vasik